
InteleGates Guide
How to Install a Gate Intercom System in 7 Steps
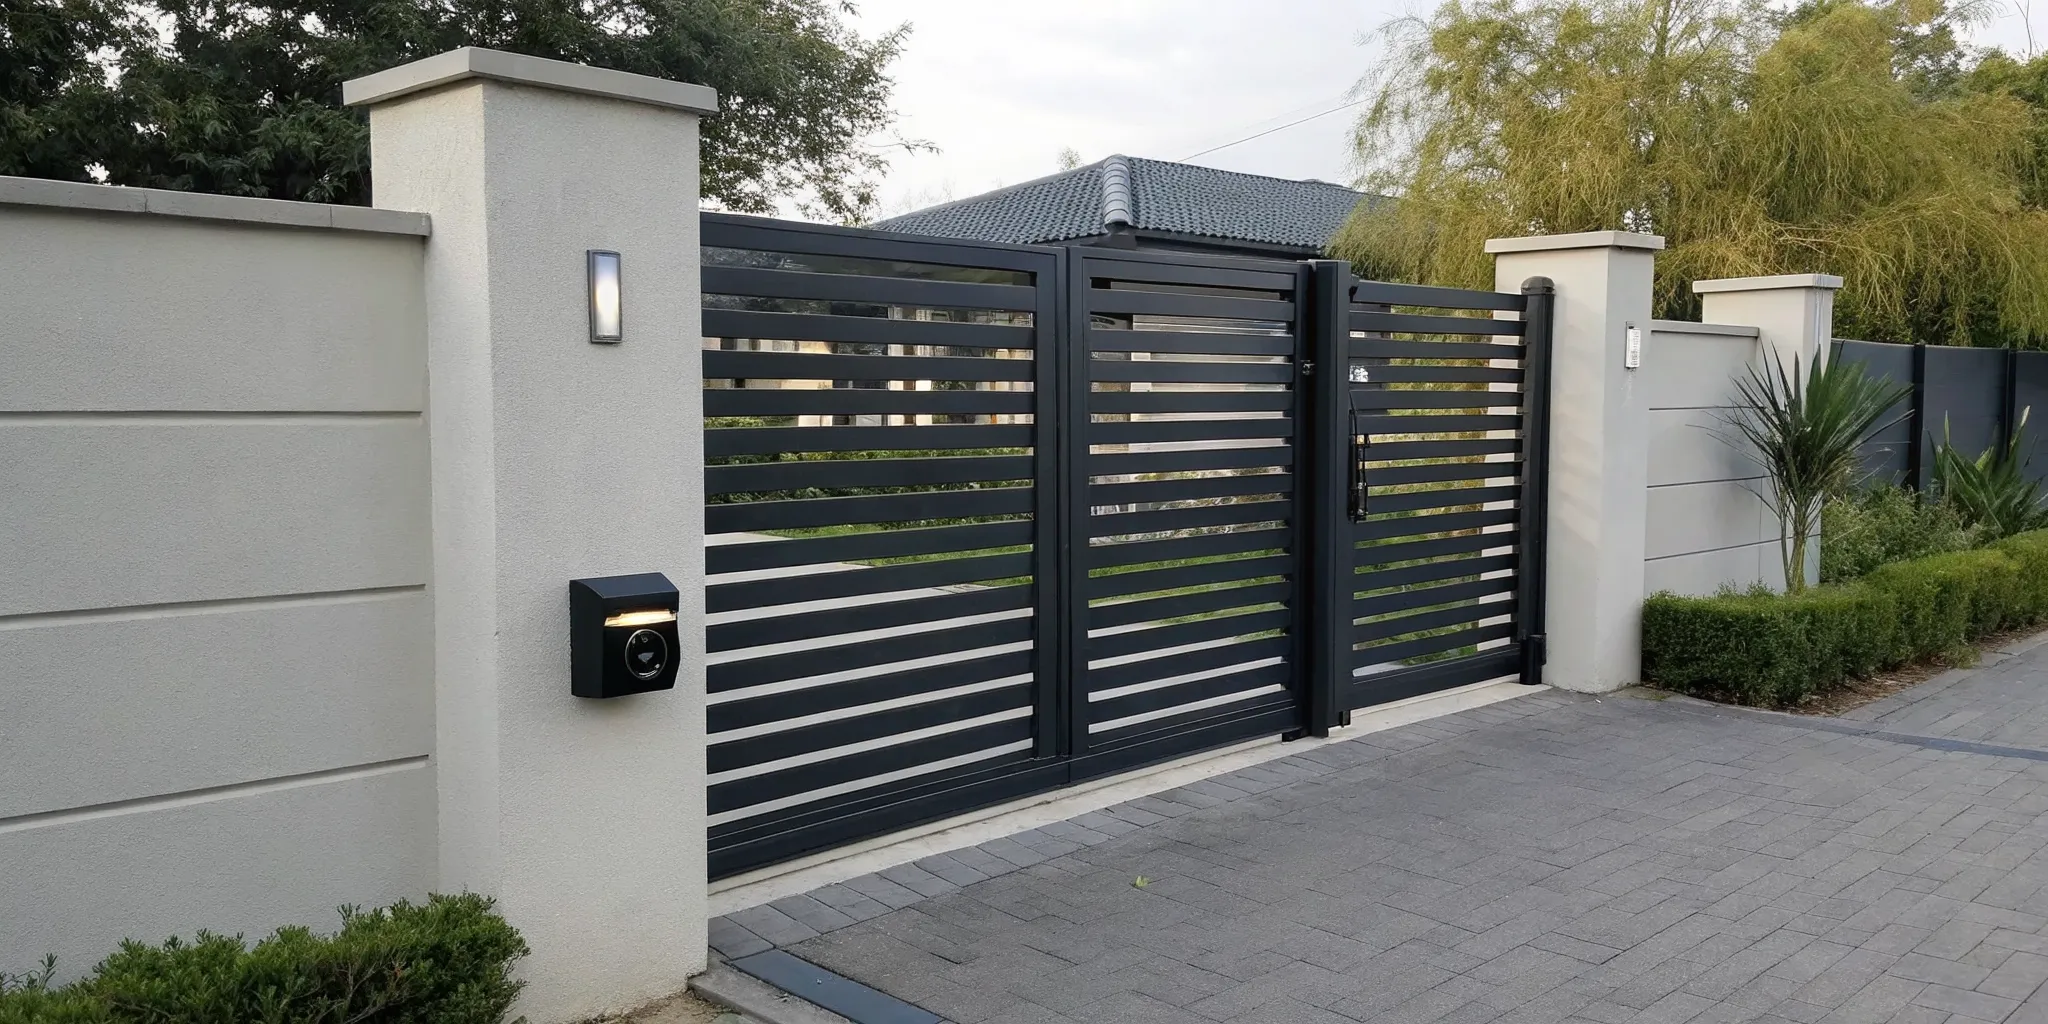
If you’re a property owner who enjoys a good project, installing a gate intercom might be next on your list. It’s a rewarding upgrade that blends practical skills with modern technology, adding real value and security to your home or business. While many modern systems are designed to be user-friendly, a successful installation depends on getting the details right. You need to consider power sources, weatherproofing, and ensuring the new unit communicates perfectly with your gate opener. This guide is for the confident DIYer who wants to do the job correctly. We’ll provide the expert insights and detailed steps on how to install a gate intercom system, helping you avoid common pitfalls and achieve a professional-quality result you can be proud of.
Key Takeaways
- Choose features that simplify your life: Prioritize a video intercom for better security and look for mobile app control to manage access from anywhere, ensuring the system is a true convenience, not a complication.
- Plan your installation for a smooth process: Before you begin, pick the best spot for your outdoor unit, inspect all wiring for potential damage, and confirm your power source is correct to avoid common installation headaches.
- Know when to call a professional: While a simple wireless intercom can be a rewarding DIY project, hiring an expert is the safest choice for handling electrical work and integrating the system perfectly with your gate opener.
What Is a Gate Intercom and How Does It Work?
Think of a gate intercom as a modern-day doorman for your property. It’s a communication system that connects an outdoor station at your gate to an indoor unit inside your home or business. When a visitor arrives and presses the call button, you can speak with them, and with video models, see them in real-time. This simple setup gives you complete control over who comes and goes without you ever having to walk to the gate.
The real magic is in the convenience and security it adds. You can easily verify delivery drivers, greet guests, or turn away solicitors from the comfort of your living room or office. With the press of a button, you can trigger your gate’s electric lock to grant access. An intercom system service is a fundamental part of a secure property, creating a seamless and safe entry process for authorized visitors while keeping unwanted guests out. It bridges the gap between your front gate and your front door, making property management much simpler.
Key Components of an Intercom System
Every intercom system is built from a few core parts that work together. First, you have the outdoor station, which is the weatherproof box mounted at your gate. This unit contains the microphone, speaker, call button, and often a camera. Next is the indoor station, your command center inside the property. This could be a wall-mounted monitor with a screen and handset, or it might connect directly to your smartphone through an app. These two units are connected by either physical wiring or a wireless signal. Finally, the system links to your gate’s electric lock, allowing you to remotely activate the gate automation and let someone in.
Wired vs. Wireless Systems: What's the Difference?
Choosing between a wired and wireless system is one of the first big decisions you'll make. A wired system uses physical cables run underground to connect the outdoor and indoor units. This creates an incredibly reliable and secure connection that isn’t affected by signal interference. It’s the perfect choice for new construction where you can easily lay the conduit before pouring concrete or finishing landscaping.
A wireless system, on the other hand, communicates using Wi-Fi, radio frequencies, or even a cellular network. Its main advantage is the flexible and less disruptive installation, making it ideal for existing properties where trenching for wires would be difficult and costly. While convenient, performance can depend on signal strength. The right access control system for you will depend on your property’s layout and your specific security needs.
Essential Features for Your Gate Intercom
Choosing a new gate intercom is about more than just picking a brand off the shelf. It’s about finding the right set of features that fits your property, your security needs, and your daily life. A great intercom system should make you feel more secure and make managing access to your home or business easier, not more complicated. From deciding between video and audio to considering how it will connect with your other devices, there are a few key features to think about. Let's walk through the most important ones so you can feel confident in your choice.
Video vs. Audio: Which to Choose?
The most fundamental choice you'll make is whether you want a video or an audio-only intercom. An audio system lets you speak with visitors at your gate, which is a solid baseline for security. A video intercom, however, adds a powerful layer of verification. It allows you to see who is at the gate on an indoor monitor or your phone before you even speak to them. Many modern video units also include night vision, so you have a clear view around the clock. For most property owners, the peace of mind that comes with visual confirmation makes a video intercom system service the clear winner.
Remote Access and Mobile App Control
Imagine being able to see who’s at your gate and let them in, even when you’re at the office or on vacation. That’s the convenience of remote access. Many modern intercoms connect to your home’s Wi-Fi and have a dedicated mobile app for your smartphone. This lets you receive a notification when someone rings, see a live video feed, have a two-way conversation, and open the gate with a simple tap. This feature is a game-changer for managing deliveries, granting access to service providers, or letting in friends and family when you’re running late. It’s a core part of a truly modern gate automation setup.
Weatherproofing and Durability
Your outdoor intercom unit is going to be exposed to the elements 24/7. Here in Los Angeles, that means intense sun, occasional downpours, and dust. A unit that isn't built to last won't be a good investment. Look for intercoms with high durability ratings that are specifically designed to be weatherproof. This means they have sealed casings made from tough materials that protect the sensitive electronics inside from moisture and heat. A properly installed, durable unit will function reliably for years, which is why we always prioritize quality components in every electric gate system installation.
Compatibility with Your Gate Opener
Your intercom and your gate opener need to work together seamlessly. The intercom is the brain, but the gate opener is the muscle; one has to tell the other what to do. While most intercom brands are designed to be compatible with various gate openers, it's not something you want to leave to chance. Before you buy, it’s essential to confirm that the two systems can communicate. This is where professional guidance is invaluable, as an expert can recommend a pairing that guarantees your complete access control system works perfectly from day one.
Smart Home and Cloud Integration
For a truly connected property, look for an intercom that integrates with other smart systems. Some models can link with your smart home platform, allowing you to trigger other actions, like turning on porch lights when the gate is opened. Cloud-based intercoms take this a step further by receiving automatic software updates over the internet. This ensures your system stays current with the latest features and security patches, extending its lifespan and value. Combining this with other advanced features like underground vehicle detection creates a sophisticated, responsive, and secure entry point for your property.
Gather Your Tools and Materials
Before you start drilling holes or running wires, let's get organized. Taking the time to gather everything you need upfront is the secret to a smooth, headache-free installation. Think of it as your pre-project checklist. It prevents that frustrating moment when you realize you’re missing a crucial screw or tool and have to drop everything for a hardware store run. A little preparation now will save you a lot of time and effort later. Let’s walk through exactly what you’ll need to have on hand.
Essential Tools
Having the right tools for the job makes all the difference. You don't need a professional-grade workshop, but a few key items are non-negotiable. Make sure you have a good quality screwdriver set, an electric drill with various bits for mounting, and a razor blade for cleanly stripping wires. You’ll also want fish tape, which is a lifesaver for pulling wires through walls or conduit. And of course, you'll need your smartphone for the final configuration steps. If gathering these tools feels like the first hurdle, remember our team is always ready to help with our professional intercom system service.
Here’s a quick list of what to grab:
- Smartphone
- Electric drill and bits
- Screwdriver set
- Fish tape
- Wire strippers or a razor blade
Required Materials and Hardware
Beyond tools, you'll need the right materials to connect everything. Your intercom system’s manual is your best guide here, so give it a thorough read to see what it requires. The most important material is the wiring. You'll likely need specific types of wire for power, data (like an Ethernet cable), and the door release mechanism. Using the wrong kind can lead to poor performance or system failure. You should also have the correct screws or anchors for your mounting surface, whether it's stucco, wood, or metal. A tube of weatherproof silicone sealant is also a great idea to protect outdoor connections from the elements, ensuring your access control system lasts for years.
Plan Your Power Supply
Let's talk about power. Before you connect your new intercom, you need to be sure you have a reliable and compatible power source. This is a step you absolutely don't want to skip. If you’re comfortable doing so, use a multimeter to check the voltage at your power source to confirm it matches what your intercom requires. This quick check prevents you from accidentally damaging your new equipment. Also, take a moment to inspect your main power supply and any related fuses. If you're tapping into the power for your gate operator, you want to ensure the circuit can handle the additional load. If electrical work isn't your strong suit, this is the perfect time to call a professional for your electric gate system installation.
Prepare Your Installation Site
Before you pick up a drill, let's talk about prep work. A little planning at this stage saves you a lot of headaches later. Getting your site ready means finding the perfect spot for your new intercom, making sure you have the right power and wiring, and thinking about who will be using it every day. A smooth installation starts with a solid plan, so let’s walk through exactly what you need to do to prepare your property for its new access control upgrade. This is where you lay the groundwork for a system that’s not just functional, but also convenient and secure.
Choose the Best Location
The right spot for your intercom is one that offers a clear, wide-angle view of your entrance so you can see who’s visiting. Place it where it’s easily visible to guests but also somewhat protected from direct rain and harsh sun, which can damage the lens and electronics over time. You’ll also want to consider its proximity to your gate opener and power source to simplify wiring. The goal is to find a location that balances visibility, protection, and accessibility. An ideal intercom system service can help you select a unit with features like a mobile app and cloud-based management that perfectly fit your property’s layout and your security needs.
Check Existing Wiring and Power
Now, let's talk about power. If you're replacing an old system, you might have existing wiring you can use. Before you do, inspect every inch of it for fraying, cracking, or other damage. Old, compromised wires can cause system failures. If the wiring looks bad or you’re starting from scratch, you’ll need to run new cables. For power, use a multimeter to confirm you have the correct voltage at the installation point. A stable power supply is non-negotiable for reliable performance. If you're not comfortable with electrical work, this is the perfect time to call in a professional for your electric gate system installation to ensure everything is safe and up to code.
Consider User Accessibility
Think about who will be using the intercom most often. For a driveway gate, the unit should be mounted at a height that’s comfortable for someone to reach from a car window. You might need to account for different vehicle sizes, from sedans to delivery trucks. If your gate also serves pedestrians, make sure the intercom is just as easy for them to use. For commercial properties, it's important to consider ADA guidelines to ensure the system is accessible to everyone. Taking a moment to think through these daily interactions will make your new access control system much more user-friendly for you and your visitors.
Mark and Prep the Mounting Surface
Once you’ve settled on the perfect spot, it’s time to get it ready for mounting. Most intercoms come with a mounting template or a backplate. Hold it against the wall at the height you’ve chosen and use a pencil to mark where the screw holes and wiring will go. Before you drill, check what’s behind the surface. You’ll want to drill into studs for a secure fit if possible, or use the appropriate wall anchors for materials like stucco, brick, or concrete. Finally, give the surface a quick wipe-down to make sure it’s clean. This simple step ensures the unit sits flush against the wall and creates a tight seal.
How to Install a Gate Intercom System: A Step-by-Step Guide
Installing a gate intercom system is a detailed process that requires careful planning and execution. While it might seem like a straightforward DIY project, each step involves specific technical skills, from electrical wiring to system programming. This guide breaks down the core stages of the installation to give you a clear picture of what the job entails. Whether you’re tackling it yourself or preparing for a professional installation, understanding these steps is key to a successful outcome. A properly installed intercom not only adds convenience but also significantly strengthens your property's security. It acts as a digital gatekeeper, allowing you to see and speak with visitors before granting them access. For many property owners, this peace of mind is invaluable. The following steps will walk you through the entire process, from the initial blueprint to the final system test, helping you appreciate the precision required for a flawless setup.
Step 1: Plan Your Installation Layout
Before drilling any holes, map out your entire system. Decide on the exact locations for the outdoor station at your gate and the indoor unit(s) inside your property. Think about the user experience: is the outdoor unit at a comfortable height for both drivers and pedestrians? Is the indoor monitor in a central, easy-to-access spot? Planning the wiring route is also critical. If you’re building a new property, integrating the intercom design early can save you significant time and money. A well-thought-out plan prevents headaches later and ensures your intercom system service is seamless from day one.
Step 2: Run the Wiring
For a wired system, this is often the most labor-intensive step. If you have existing wiring, inspect it carefully for any signs of damage, as old or frayed wires can cause system failures. If you’re running new cables, you’ll likely use fish tape to pull them through walls, ceilings, and conduits. It’s essential to use the correct type and gauge of wire specified by the intercom manufacturer to ensure proper power delivery and clear communication. Make sure each wire is connected to the correct port on both the indoor and outdoor units, as mixing them up will prevent the system from working.
Step 3: Mount the Outdoor Unit
The outdoor station is the face of your intercom system, so its placement and installation are vital. This unit needs to be mounted securely at your gate entrance. It must be durable enough to handle everything from intense LA sun to rain and dust. When mounting, ensure it’s at an appropriate height for easy use. After mounting the base plate, connect the wiring according to your plan and the manufacturer’s diagram. Finally, attach and seal the unit to protect the sensitive electronics inside from the elements. Proper weatherproofing is non-negotiable for the system’s longevity.
Step 4: Install the Indoor Unit
Your indoor unit, or master station, is your command center for greeting visitors. Choose a location that is convenient and easily accessible, like a kitchen, hallway, or home office. Mount the backplate securely to the wall, then pull the corresponding wires through. Just like with the outdoor unit, carefully connect each wire to its designated terminal. Once the wiring is complete, attach the main indoor unit to the mounting plate. If you have multiple indoor stations, you will repeat this process in each location, ensuring they are all connected correctly to form a cohesive system.
Step 5: Connect the Wiring and Power
With both units mounted and wires run, it’s time to power up the system. This step requires a good understanding of electrical work. First, ensure the main power at the circuit breaker is turned off for safety. Connect the system to its dedicated power supply, following the manufacturer’s instructions precisely. Once everything is connected, you can restore power. Use a multimeter to test the voltage at each station to confirm it matches the required specifications. This verification ensures the system has enough power to operate correctly and protects it from electrical damage, a key part of any reliable access control system.
Step 6: Connect the Gate Release
Integrating the intercom with your gate is what makes the system truly functional. This step involves connecting the intercom’s gate release mechanism to your automatic gate opener. You will run a wire from the intercom’s relay output to the gate operator’s control board. This connection allows the intercom to send an electronic signal that tells the gate motor to open when you press the "unlock" button on your indoor unit. Proper integration is essential for seamless gate automation, giving you the ability to grant access to visitors without leaving your home.
Step 7: Program and Configure the System
The final step is to program and test everything. Once the system is powered on, follow the manufacturer’s guide to configure its settings. This may include setting the time and date, adjusting camera angles, and programming phone numbers for mobile access. Conduct a thorough test to make sure every feature works as expected. Check for clear audio and video, confirm that the gate release function works instantly, and test any mobile app connectivity. Running these checks ensures the system is fully operational and ready to secure your property before you start relying on it daily.
Common Installation Hurdles and How to Clear Them
Even the most carefully planned project can hit a snag. When you’re installing a gate intercom, a few common issues can pop up, from tricky wiring to uncooperative components. The good news is that most of these problems have straightforward solutions. Knowing what to look for ahead of time can save you a lot of frustration and help you get your system running smoothly. Let’s walk through some of the typical hurdles and how you can clear them.
Dealing with Difficult Wiring
Faulty wiring is a frequent source of headaches during an intercom installation. Before you connect everything, it’s smart to check that your cables are in good shape. You can use a simple line tester or continuity tester to confirm the wires are intact. This quick check helps you spot problems like short circuits, grounding faults, or broken conductors that could prevent your system from working. If you find that the existing wiring is damaged or the runs are too complex, it might be time to call in a professional. A faulty connection can affect the entire system, so getting the wiring right is a step you can’t afford to skip.
Properly Weatherproofing the Outdoor Unit
Your outdoor intercom unit is on the front line, facing everything from intense sun and rain to dust and humidity. To make sure it lasts, you need to protect it from the elements. Most high-quality outdoor units are designed to be weatherproof, but it’s always a good idea to double-check the specifications. If your chosen model isn’t fully weatherproof, or if you live in an area with harsh weather, consider placing it inside a protective enclosure. This simple step is crucial for the longevity and functionality of your electric gate system installation and ensures your intercom works reliably for years to come.
Solving Compatibility Issues
It’s exciting to pick out a new intercom, but you have to make sure it will play nicely with your existing gate opener. While many intercom brands are designed to work with various gate systems, you should always confirm compatibility before you buy. A quick check of the product manuals for both your intercom and your gate opener can save you from a major installation roadblock. It’s also wise to choose a brand that offers good local support for parts and technical help. That way, if you do run into an issue with your gate automation setup, you know help is available.
Troubleshooting Audio, Video, and Power
If your system is installed but you’re not getting clear audio, video, or any power at all, you can run a few diagnostic tests. For audio or video problems, try testing the microphones and speakers one by one. If you have a spare, swapping a component with a known working unit can help you isolate the issue. For power problems, a multimeter is your best friend. Use it to verify the voltage at each intercom station and confirm the main power supply is working. Also, take a look at the fuses and power regulation boards. If these basic troubleshooting steps don’t solve the problem, it may be a sign you need professional electric gate system repair.
Test and Configure Your New Intercom
You’ve mounted the hardware and connected the wires, but the job isn’t quite finished. Testing and configuring your new intercom is the final, critical phase. This is where you ensure every component works together seamlessly, from the camera to the gate release. Taking the time to run these checks now will save you from frustrating glitches later and confirm that your system is secure, reliable, and ready for daily use. It’s the step that turns a collection of parts into a fully functional security solution for your property.
Run a Full System Test
Before you call it a day, a complete system test is essential. This is your chance to catch any small issues before they become big problems. A thorough test helps you identify and address potential issues while all your tools are still out. Start by having someone press the call button on the outdoor station. Does the indoor unit chime correctly? Does the video feed appear instantly? Go through every function, including the doorbell, two-way talk, and the gate release mechanism. This simple run-through confirms that all your hard work paid off and the system is operating exactly as it should.
Check Audio, Video, and Connectivity
Clear communication is the entire point of an intercom, so take a moment to check the quality. Have a conversation through the system to test the audio. Is the sound crisp and clear, or is it muffled or full of static? You may need to set the correct audio parameters to get the best performance. Next, look at the video feed. Check the camera’s picture quality during the day and at night to ensure you have a clear view of your visitors in all lighting conditions. If you have a wireless system, verify that the connection is strong and stable without any lag or dropped signals.
Verify Remote Access and App Functionality
If your intercom connects to a mobile app, now is the time to put its smart features to the test. Download the app on your smartphone and connect it to your system. Test every feature thoroughly. Can you receive visitor calls on your phone when you’re away from the indoor monitor? Does the video stream clearly? Most importantly, try using the remote unlock feature to open your gate. Test it while connected to your home Wi-Fi and again using cellular data to ensure your access control system works reliably, no matter where you are. This confirms you have true control over your property’s entrance from anywhere.
Show Others How to Use It
An intercom is only useful if everyone knows how to operate it. Once you’ve confirmed everything works, take a few minutes to train anyone who will be using the system, whether it’s your family, employees, or tenants. Walk them through the basic functions: answering a call, speaking with a visitor, and opening the gate. For systems with more features, consider creating a simple one-page guide they can refer to. A quick demonstration can prevent confusion and ensure everyone feels confident using the new technology. If you need help with training or ongoing support, our intercom system service is always here to help.
DIY or Hire a Pro: What's the Right Call?
You’ve picked out your intercom system and you’re ready to get it up and running. Now comes the big question: should you roll up your sleeves and install it yourself, or is it time to call in a professional? The answer really depends on the complexity of your system, your own comfort level with this kind of project, and how much time you have. Making the right choice here is about more than just saving a few dollars. It’s about ensuring your system works flawlessly and securely from day one, giving you the peace of mind you’re looking for. Let’s walk through both options so you can feel confident in your decision.
When DIY Makes Sense
A DIY installation can be a great weekend project if the conditions are right. This path is usually best if you've chosen a simpler, wireless intercom system. These models often require less invasive work since you don't have to run extensive wiring through walls or underground. If you’re generally handy, have some experience with basic electrical tasks, and feel comfortable following detailed technical manuals, you might be well-equipped for the job. Before you start, make sure you have all the necessary tools and block out enough time so you don’t have to rush. A successful DIY project can be incredibly satisfying, but it’s best suited for straightforward installations where the stakes are relatively low.
When to Call a Gate Intercom Expert
For more complex setups, calling a professional is almost always the smartest move. If your system is wired, needs to be integrated with an existing gate automation setup, or involves multiple entry and indoor units, an expert's touch is invaluable. Professionals handle electrical connections safely and ensure everything is up to code, which is crucial for both safety and performance. They have the experience to troubleshoot unexpected issues, like tricky wiring paths or compatibility problems. Plus, an expert can help you integrate the intercom with a complete access control system, ensuring your keypad, remote, and intercom all work together seamlessly. Hiring a pro gives you a clean, reliable installation and the assurance that comes with a warranty.
Maintain Your Gate Intercom System
Once your gate intercom is installed, a little regular care will keep it running smoothly for years. Think of it like any other important piece of technology at your property; consistent check-ups prevent small hiccups from turning into major headaches. Taking a few minutes each month for simple maintenance ensures your system remains a reliable first line of security and convenience. It also helps you spot potential issues before they leave you locked out or your system offline.
Routine Maintenance Tips
You don’t need to be a tech expert to keep your intercom in great shape. Start by performing a full system test every month or so. Place a call from the gate to the indoor unit to check for clear audio and a sharp video feed. If you hear static, distortion, or the picture is fuzzy, it could be an early warning sign. Next, do a quick visual inspection. Gently wipe down the outdoor camera lens and casing with a soft cloth to remove dust and grime. Look at the wiring and connections for any signs of fraying, looseness, or corrosion. Catching these small physical issues early can prevent bigger electrical problems down the road. If you spot something that looks off during your check, our intercom system service team can take a closer look.
Signs It's Time for Professional Service
While routine checks are great, some issues require an expert touch. If you notice the system is failing intermittently, like it works one day but not the next, it’s time to call a professional. This often points to an underlying problem with the power supply or internal components. Similarly, if you hear a constant buzzing sound, see a flickering screen, or if a specific unit is completely dead, it’s best to have it professionally diagnosed. Visible corrosion on connectors, water damage after a storm, or physical damage to the unit are all clear signs that you need a repair. Trying to fix complex power or wiring issues yourself can be risky and may cause more damage. When your system shows these symptoms, it's the right time to call for electric gate system repair to get it working safely and correctly.
Related Articles
- Intercom Systems: Connecting Control and Communication — InteleGates Inc.
- Remote Control And Intercom Systems For Automatic Gates — InteleGates Inc.
- Intercom Systems: The Unsung Heroes of Modern Access Control — InteleGates Inc.
- How Gate Telephone Entry Systems Enhance Control and Convenience — InteleGates Inc.
- From Installation to Maintenance: Keeping Gate Buzzer Systems Running Smoothly — InteleGates Inc.
Frequently Asked Questions
Do I really need a video intercom, or is audio enough? While an audio-only system is a definite step up from no intercom at all, a video system provides a much greater sense of security. Being able to visually confirm who is at your gate before you grant access is a powerful tool. It helps you verify delivery drivers, identify unexpected visitors, and keep a visual log of activity at your entrance. For most property owners, the added peace of mind that comes with seeing who is there makes video the superior choice.
Can I use the wiring from my old intercom for a new one? You might be able to, but you need to be cautious. Before you connect a new system, it's essential to inspect the old wiring thoroughly for any signs of wear, cracking, or damage from the elements. Technology also changes, and the wiring required for a modern, high-definition video system may be different from what your old audio-only unit used. If the wires are old or not the right type, you'll get poor performance, so replacing them is often the safest bet for a reliable installation.
How do I make sure the intercom I buy will work with my automatic gate? This is a critical step you don't want to overlook. The best way to ensure compatibility is to check the technical specifications for both the intercom and your gate opener. Most manufacturers provide this information in their product manuals. However, the easiest and most reliable method is to consult with a professional. An expert can quickly identify which systems will integrate seamlessly, saving you the headache of buying an intercom that can't communicate with your gate.
What's the most common cause of intercom problems? Many intercom issues can be traced back to two main culprits: power supply problems and exposure to the elements. An unstable or incorrect power source can cause the system to malfunction or fail completely. The outdoor unit is also constantly exposed to sun, rain, and dust, which can damage the electronics or camera lens over time if it isn't properly weatherproofed. Regular checks and proper installation are the best ways to prevent these common issues.
Is a wireless system less secure than a wired one? Not necessarily, but they have different vulnerabilities. A wired system's main security advantage is its physical connection, which can't be easily interrupted without cutting a cable. A wireless system relies on a Wi-Fi or radio signal, which could theoretically be subject to interference. However, modern wireless intercoms use strong encryption to protect their signals. The right choice depends on your property; a wired system is incredibly reliable if you can run the cables, while a high-quality wireless system offers great security with a much more flexible installation.