
InteleGates Guide
How to Install a Gate Motor: A Step-by-Step Guide
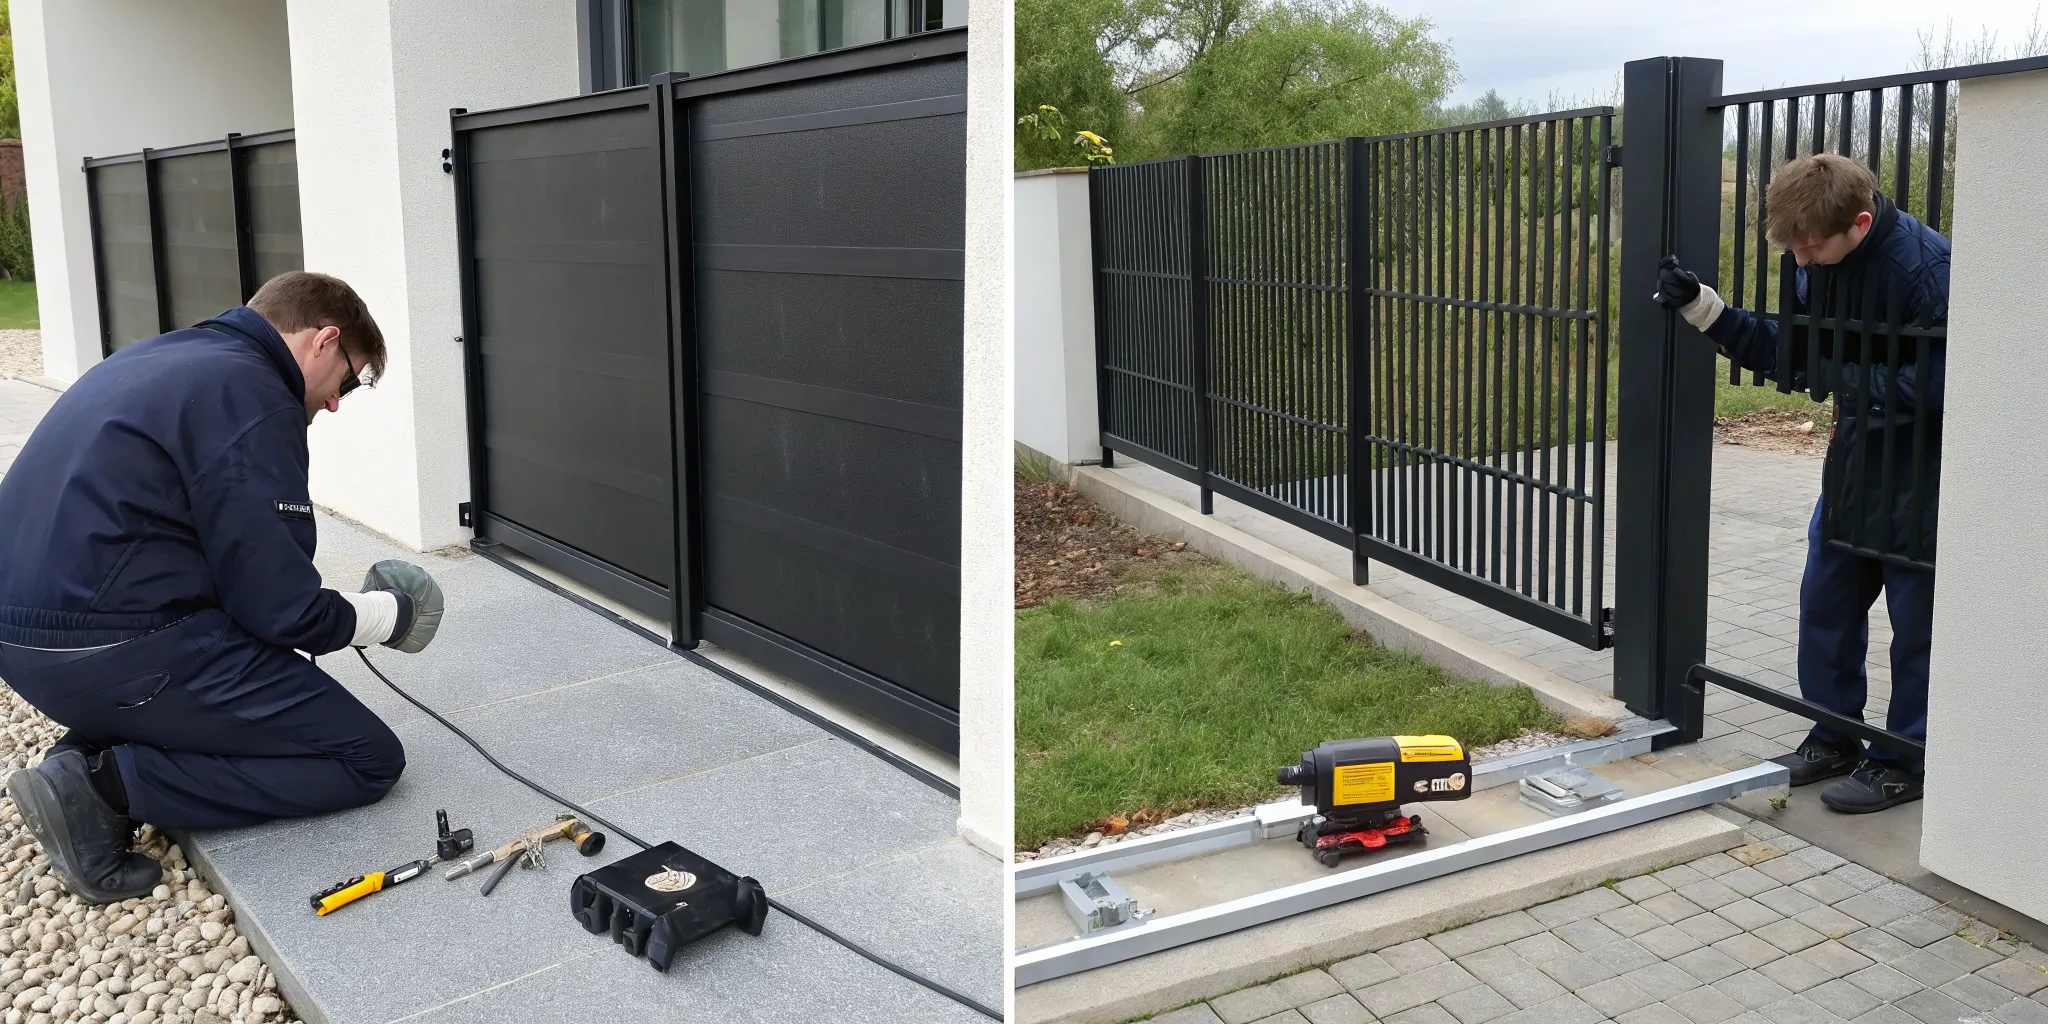
Nothing is more frustrating than a brand-new piece of equipment that fails just a few months after installation. When it comes to gate motors, this is often the result of a few common, avoidable mistakes made during the setup process. A misaligned gate, an improperly secured motor, or incorrect wiring can cause premature wear and lead to costly repairs. This guide is focused on helping you get it right the first time. By showing you how to install a gate motor correctly, we’ll help you sidestep the pitfalls that plague many DIY installations. Following these steps ensures your investment is protected and prevents you from needing an electric gate system repair down the line.
Key Takeaways
- Build a Strong Foundation First: Before you even think about the motor, focus on the prep work. This includes pouring a stable concrete pad, running all wiring through a protective conduit, and making sure your gate is perfectly aligned to move without resistance.
- Test Your Safety Features Religiously: Your gate's safety systems, like photoelectric sensors, are not just add-ons; they are essential. You must install them correctly and test them repeatedly to confirm the gate stops and reverses immediately when an object breaks the beam.
- Don't Hesitate to Call a Professional: While this guide gives you the roadmap, electrical work and fine-tuning can be tricky. If you hit a snag or feel unsure about any step, especially wiring, calling an expert is the smartest decision for a safe and reliable installation.
What Tools and Materials Will You Need?
Before you start any project, it’s always a good idea to gather everything you need in one place. Installing a gate motor is no different. Having all your tools and materials ready will make the process much smoother and help you avoid any last-minute trips to the hardware store. Think of it as your pre-installation checklist. This preparation ensures you can focus on getting the job done right, from pouring the foundation to programming the final settings. Let’s walk through exactly what you’ll need to get your gate automated.
Your Essential Toolkit
First, let’s talk tools. You’ll need a few specific items to handle the mechanical and electrical parts of the installation. Make sure you have a drill with a 1/2-inch concrete bit for creating holes in the foundation. A string line and a level are essential for ensuring everything is perfectly aligned and straight. You’ll also need anchor bolts to secure the motor, along with screwdrivers and both 5/16" and 3/4" wrenches. Depending on how you plan to attach the motor, you may need either welding gear or simple bolt-on brackets. Finally, have a pair of wire strippers handy for the electrical connections.
Required Materials and Hardware
Beyond your tools, you’ll need some key materials. The most important is a solid concrete pad to serve as the motor's foundation. A base that is 24 inches long, 24 inches wide, and 24 inches deep is recommended, with about four to six inches sticking out above the ground for stability and moisture protection. Safety is also a top priority, so you must include a secondary safety device. You can choose between a Safety Edge or an additional photoeye to ensure your gate operates safely for everyone. These components are non-negotiable for a secure and compliant installation.
How to Choose the Right Motor for Your Gate
Selecting the right motor is critical, as there isn't a universal motor that works for every gate. The best choice depends on your gate's size, weight, and type. A key rule of thumb is to choose a motor rated for at least 25 percent more than your gate’s actual weight. This extra capacity prevents the motor from straining, which extends its lifespan and ensures reliable performance. If you're unsure which motor fits your needs, getting expert advice on gate automation can save you from costly mistakes and ensure your system works perfectly from day one.
How to Prep Your Site for Installation
Before you even think about mounting the motor, a little prep work will go a long way. Getting your site ready is arguably the most important part of the entire process. These foundational steps ensure your gate motor has a stable base, a safe power supply, and a smooth path to travel. Taking the time to do this right prevents major headaches down the road and is the secret to a long-lasting, reliable system. A proper electric gate system installation is built on a solid foundation, so let’s walk through exactly what you need to do to prepare your property for its new upgrade. From checking local rules to making sure your gate is perfectly aligned, each step sets the stage for a successful installation.
Check Local Regulations and Building Codes
First things first, let's talk rules. Before you dig or run any wires, you need to check the local building codes for your area. Electrical work, especially for something like gate automation, has strict safety standards. For example, most codes require that the power supply runs from a dedicated circuit through a buried conduit, typically at least 18 inches deep. This isn't just red tape; it’s about keeping your property and everyone on it safe. A quick call to your local building department can clarify what’s required. Getting this step right from the start saves you from potential fines and the hassle of redoing your work later.
Pour a Concrete Pad
Your gate motor is a powerful piece of equipment, and it needs a solid, stable surface to sit on. That’s where a concrete pad comes in. This isn't the place to cut corners. A sturdy concrete base prevents the motor from shifting or vibrating, which can cause wear and tear over time. For a standard installation, you’ll want to build a concrete base that is about 24 inches long, 24 inches wide, and 24 inches deep. Plan for about four to six inches of the pad to stick out above the ground. This elevation helps keep the motor dry and protected from ground moisture and debris.
Run Underground Wiring and Conduit
A clean installation is a safe installation. Running your wiring underground through a conduit protects it from the elements, lawnmowers, and pests, ensuring your system works reliably for years. You’ll need to plan routes for all the necessary wires, including the main power wires, low-voltage wires for accessories, and any wiring for safety sensors. If you're including features like an underground vehicle detection system, you'll need to run conduit for those loops as well. Make sure all your conduits lead directly to the spot where your gate motor's control board will be, keeping everything organized and protected.
Ensure Proper Gate Alignment and Leveling
This might be the most overlooked, yet critical, prep step. If your gate isn’t perfectly level and aligned, it forces the motor to work much harder with every single cycle. Think about trying to push open a heavy door that scrapes against the floor; that extra resistance is exactly what your motor will feel. This constant strain is the number one cause of premature motor failure. Before you install the motor, open and close your gate manually. Does it swing or slide smoothly without catching or dragging? If not, you may need an electric gate system repair to fix the alignment first. A well-balanced gate is key to a happy motor.
How to Mount Your Sliding Gate Motor, Step by Step
With your concrete pad cured and ready, it's time for the main event: mounting the sliding gate motor. This is where your gate starts to become an automatic system. Getting the placement and alignment right is key to a smooth, reliable operation for years to come. It might seem technical, but if you follow these steps carefully, you can get it done right. Let's walk through it.
Position the Motor Correctly on the Pad
First, place the motor on the concrete pad. You're not bolting it down just yet, just finding the sweet spot. As a general rule, the motor should sit about 2 to 2.5 inches away from the gate itself. This spacing gives the gear enough room to engage with the rack without being too close or too far. Take a moment to measure and mark the position. This initial placement is the foundation for everything that follows, so double-check that it aligns with your gate's path of travel before moving on.
Secure the Motor with Anchor Bolts
Once you've marked the perfect spot, it's time to make it permanent. Secure the motor's base plate to the concrete pad using anchor bolts. Drill into the concrete, insert the bolts, and tighten them down so the plate is completely stable and won't budge. After the base plate is secure, you can mount the motor onto it. A wobbly motor is an unsafe motor, and it can cause serious wear on the gear and rack. Taking the time to secure it properly is a non-negotiable step for a safe and effective gate automation system.
Attach and Align the Rack to the Gate
Now, let's get the rack attached to the gate. The rack is the long, toothed bar that the motor's gear will pull to open and close the gate. With the gate fully closed, place the first piece of the rack onto the motor's gear. This ensures your starting point is perfectly aligned. From there, attach the rack sections one by one along the bottom of the gate, making sure they form a straight, continuous line. Use a level to keep everything perfectly horizontal. Any misalignment here can cause the gate to jerk or get stuck during operation.
Set the Gear Gap for Smooth Operation
This next step is subtle but incredibly important. You need to create a tiny gap, about 1-2 millimeters (the thickness of a dime), between the teeth of the rack and the motor's gear. This small space prevents the components from grinding against each other, which reduces noise and significantly extends the life of your motor. To check the gap, gently push the gate back and forth by hand. You should feel a tiny bit of play. If it’s too tight or too loose, adjust the motor's position before tightening everything down for good.
Program the Open and Close Limits
Finally, you need to teach your motor where to stop. This process, called setting the limits, tells the motor the exact positions for fully open and fully closed. Most modern motors use electronic limits or magnetic switches that you place at each end of the gate's travel path. Follow your motor's specific manual to enter programming mode and run the gate through a full open-and-close cycle. This step is crucial for safety and function. If you find the programming steps confusing, it might be a good time to call for a professional electric gate system installation to ensure everything is set up correctly.
How to Wire a Gate Motor Safely
Wiring is where your gate motor project really comes to life, but it’s also the step that requires the most attention to detail. Safety is everything here. An improperly wired gate motor isn’t just a performance issue; it’s a serious hazard that can cause electrical shocks, fires, or damage to your new equipment. Before you touch a single wire, make sure the main circuit breaker supplying power to the gate is turned off. Double-check it. This part of the installation involves connecting the motor to its power source, integrating essential safety devices, and ensuring everything complies with local electrical codes.
Even if you’re comfortable with DIY projects, electrical work is a different beast. It’s governed by strict regulations for a reason. Your goal is to create a secure, reliable system that functions correctly every time you press a button. This means following the manufacturer’s wiring diagrams to the letter and never cutting corners. We’ll walk through the key components of wiring your motor, from connecting the main power to installing the safety features that protect your family and property. If at any point you feel unsure, remember that calling a professional is the safest and most effective path forward. A proper electric gate system installation ensures your system is both safe and built to last.
Connect the Power Supply to the Control Board
With the power definitively off at the breaker, your first task is to connect the main power wires to the motor’s control board. These wires should have been run through an underground conduit to the concrete pad during your site prep. Carefully strip the ends of the wires and connect them to the designated terminals on the control board, usually labeled for line, neutral, and ground. Follow your motor’s specific wiring diagram precisely, as the layout can vary between models. A secure connection is key, so ensure the screws are tightened properly without overtightening and damaging the board. It’s critical to leave the power off until every other component, especially the safety devices, is fully installed and wired.
Install Photoelectric Sensors and Safety Edges
Photoelectric sensors are a non-negotiable part of any automatic gate system. These devices create an infrared beam across your driveway. If a person, pet, or vehicle breaks that beam while the gate is closing, the motor will immediately stop and reverse, preventing a potential accident. You’ll install one sensor on each side of your gate path, ensuring they are perfectly aligned. Once they’re mounted, you’ll run their wiring back to the control board and connect them to the specified terminals. Always test this feature multiple times after the installation is complete. These sensors are a core component of modern gate automation and are often required by law for safety compliance.
Add a Backup Power Supply
What happens if the power goes out? Without a backup power source, your property could be left unsecured or you could be stuck outside (or inside) your gate. Adding a battery backup system ensures your gate remains operational during an outage. Most modern gate motors are designed to accommodate a battery backup, and some low-voltage or solar-powered systems require it. The backup battery is typically wired directly to the control board, where it stays charged by the main power source. When the power cuts out, the system automatically switches to battery power. This feature provides peace of mind and is an essential part of a complete access control system.
Know When to Call a Licensed Electrician
We can’t stress this enough: if you have any doubts about the electrical work, it’s time to call a professional. A licensed electrician or a specialized gate technician understands local building codes and can ensure your wiring is safe, compliant, and correct. Mistakes during this phase can be costly and dangerous, leading to motor burnout or electrical hazards. A professional can also verify that your power source is adequate and properly grounded. Making the call for an expert isn’t admitting defeat; it’s making a smart, responsible decision to protect your investment and ensure your family’s safety. If something goes wrong with a DIY attempt, you’ll need professional electric gate system repair anyway, so it’s often best to start with an expert.
How to Test and Troubleshoot Your New Gate Motor
With your new gate motor installed, you’re on the home stretch. This final phase is all about testing to make sure everything works correctly and safely. Taking the time to run these checks now will save you from headaches later and ensure your gate operates reliably for years to come. Think of it as a final quality check before you officially call the job done. Let’s walk through the essential tests and troubleshooting steps to confirm your installation was a success.
Run the First Open-and-Close Cycle
Before you do anything else, run the gate through a complete open-and-close cycle at least ten times. This initial test helps the system settle in and gives you a chance to observe its performance. Watch the gate’s movement closely. Does it move at a consistent speed without slowing down or speeding up unexpectedly? Listen for any strange noises like grinding, clicking, or straining. Smooth, quiet operation is the goal. If you notice any hitches or hear sounds that seem off, it’s a sign that you may need to re-check the gear gap or gate alignment before proceeding.
Test Your Remotes and Access Control Devices
Once the gate itself is moving smoothly, it’s time to test all the ways you’ll be opening it. Start with your remote controls, testing them from various distances and angles. Next, move on to any other access methods you’ve installed. If you have a keypad, enter the code to ensure it triggers the gate. Test your intercom system service to make sure communication is clear and the open-gate function works. By testing each component one by one, you can easily pinpoint where the problem is if something doesn’t work, rather than guessing what might be wrong with your entire access control system.
Verify the Safety Features Are Working
This is the most important test of all. Your gate’s safety features are non-negotiable, especially if you have children, pets, or frequent visitors. Start with the photoelectric sensors. While the gate is closing, carefully wave an object (like a piece of cardboard) between the two sensors to break the beam. The gate should immediately stop and reverse direction. Test this multiple times to be certain it works every time. If you have safety edges installed, gently press on them during the closing cycle to confirm they also stop and reverse the gate. A gate that doesn't react instantly is a serious safety hazard that needs immediate attention.
Common Mistakes to Fix Before You Finish
Before you pack up your tools, do one last check for common installation mistakes that can cause premature motor failure. The number one culprit is poor gate alignment. A gate that isn’t perfectly level or has sagging hinges forces the motor to work much harder than it should. Double-check that the gate swings or slides freely without any resistance when the motor is disengaged. Also, confirm you used strong enough hardware for the gate’s weight and that the posts are secure. Fixing these issues now prevents you from needing a costly electric gate system repair down the road.
Maintain Your Gate Motor for Long-Term Use
Your gate motor is a machine that requires a little care to keep it running smoothly. Get into the habit of performing simple maintenance every few months. Keep the motor housing clean and clear away any leaves, dirt, or cobwebs. If you have a sliding gate, make sure the track is free of debris that could obstruct the wheels. Lubricating the hinges, wheels, and chains according to the manufacturer’s instructions will also ensure long-term reliability. A few minutes of preventative care can add years to your motor’s life and is a key part of responsible ownership. For a more hands-off approach, you can always schedule professional electric gate system maintenance.
When to Call a Professional Gate Installer
While a DIY installation can be rewarding, it’s also complex. If you’ve run through these tests and something still isn’t right, it’s time to call a professional. Don’t risk it if the safety features are failing, the gate is moving erratically, or you’re unsure about the wiring. An incorrect installation can void your warranty, damage the motor, or create a dangerous situation. A professional installer has the experience to diagnose and fix the problem safely and efficiently. Getting an expert opinion from a company that handles electric gate system installation every day provides peace of mind and ensures your property is secure.
Related Articles
- Proper Installation Of Automatic Gates — InteleGates Inc.
- What to Expect During an Electric Gate Installation: A Step-by-Step Breakdown — InteleGates Inc.
- Gate Motor Sticking Out Like a Sore Thumb? — InteleGates Inc.
- From Manual to Magical: How Gate Automation Works Step-by-Step — InteleGates Inc.
- Top Signs an Electric Gate Motor Needs Immediate Repair — InteleGates Inc.
Frequently Asked Questions
Can I really install a gate motor myself, or should I just hire a professional? That's the big question, isn't it? A DIY installation is definitely possible if you're comfortable with both mechanical work and basic electrical wiring. However, if you feel any hesitation, especially around connecting the power or ensuring safety compliance, calling a professional is the smartest move. An expert installer handles these projects every day, knows the local codes inside and out, and can get the job done safely and efficiently, giving you total peace of mind.
What happens if I choose a motor that's too weak for my gate? Choosing an underpowered motor is a recipe for frustration and premature failure. The motor will constantly strain to move the gate's weight, causing it to run slower, overheat, and wear out much faster than it should. Think of it like trying to tow a heavy trailer with a small car; the engine just wasn't built for that kind of load. You'll end up facing costly repairs or a full replacement much sooner, so it's always best to select a motor rated for more than your gate's actual weight.
Are safety sensors really necessary for my gate? Yes, absolutely. Safety sensors, like photoelectric beams, are a non-negotiable part of any modern gate installation. They act as a crucial safety net, stopping and reversing the gate if a person, pet, or vehicle crosses their path. Not only do they prevent serious accidents and damage, but they are also often required by law. Skipping this step is a risk you should never take.
What's the single biggest mistake I can make during this installation? The most common and costly mistake is installing a motor on a gate that isn't perfectly aligned or balanced. Before you even think about the motor, your gate should glide open and closed smoothly by hand. If it drags, sticks, or feels heavy, the motor will have to fight that resistance with every cycle. This constant strain is the number one cause of early motor burnout, so always fix the gate itself first.
My gate motor is installed! What do I need to do to keep it running well? Congratulations! A little regular care will go a long way in keeping your new system happy. The best thing you can do is keep the gate's path and the area around the motor clear of debris like leaves, dirt, and rocks. Every few months, it's also a good idea to lubricate the gate's hinges and wheels according to the manufacturer's guide. This simple routine prevents unnecessary strain and ensures your motor has a long, reliable life.